Growing Cannabis: the Essentials for Beginners
Article written by

Dipak HemrajHead of Research and Education
Content reviewed by

Dr. Lewis JasseyMedical Director - Pediatric Medicine
So, you’re interested in growing cannabis? This blog will go over all of the essential information that any beginner needs to know before buying their first seedling. You can also learn how to set up an indoor grow room relatively inexpensively and easily.
Get your medical marijuana card
Connect with a licensed physician online in minutes.

The Essentials – The Cannabis Plant Grow Cycle
For this section, we are talking about cannabis growing in a soil medium, as this is easiest to explain, although the general pattern is the same with other growing mediums.
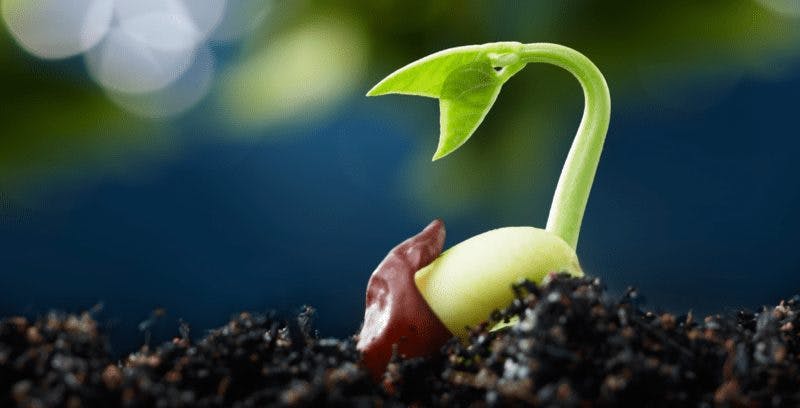
Germination – 24 hours to 2 weeks.
This is where you can spray two to four sheets of paper towels (kitchen towels) with some water so it’s damp but not soaking, put a seed in between them and onto a plate, and wait for a taproot to emerge. Keep the room temperature somewhere between 70 and 90˚F.
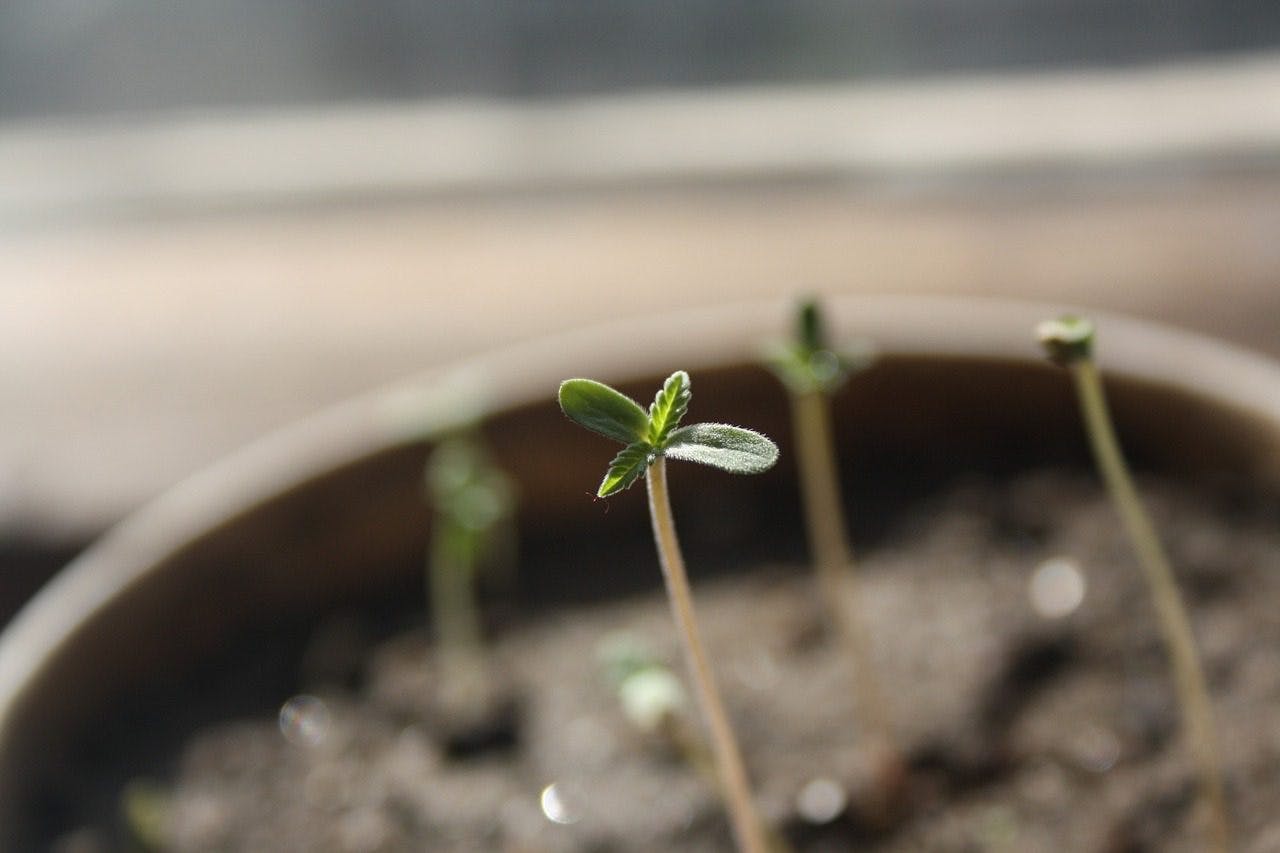
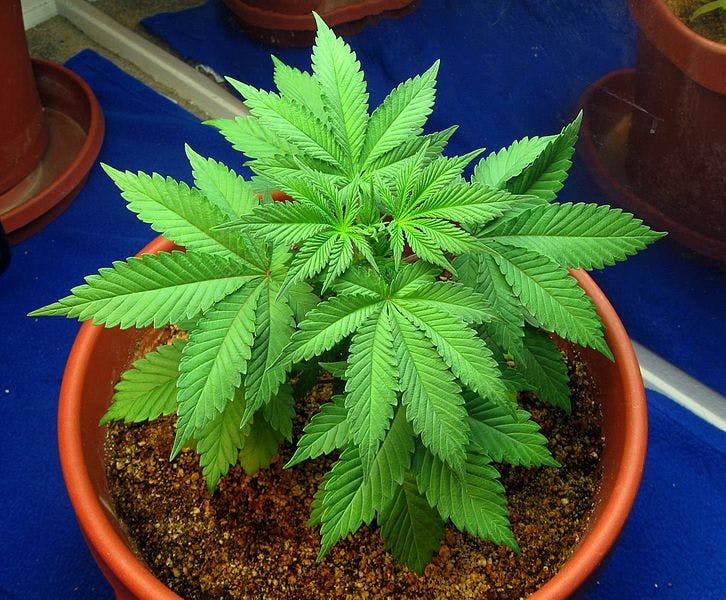
Seedling Stage – 2 to 3 weeks.
You transfer the germinated seed to a small pot of soil or whatever other medium you are using. During the seedling stage, it will produce two leaves that open outward from the stem to start receiving sunlight. This is when you start seeing a mini cannabis plant. Seedlings should be kept at 77˚F with a humidity of around 60%. Cannabis likes a light cycle of 18-hours of white light per day once the leaves have emerged. Use a nitrogen-rich fertilizer at this point.
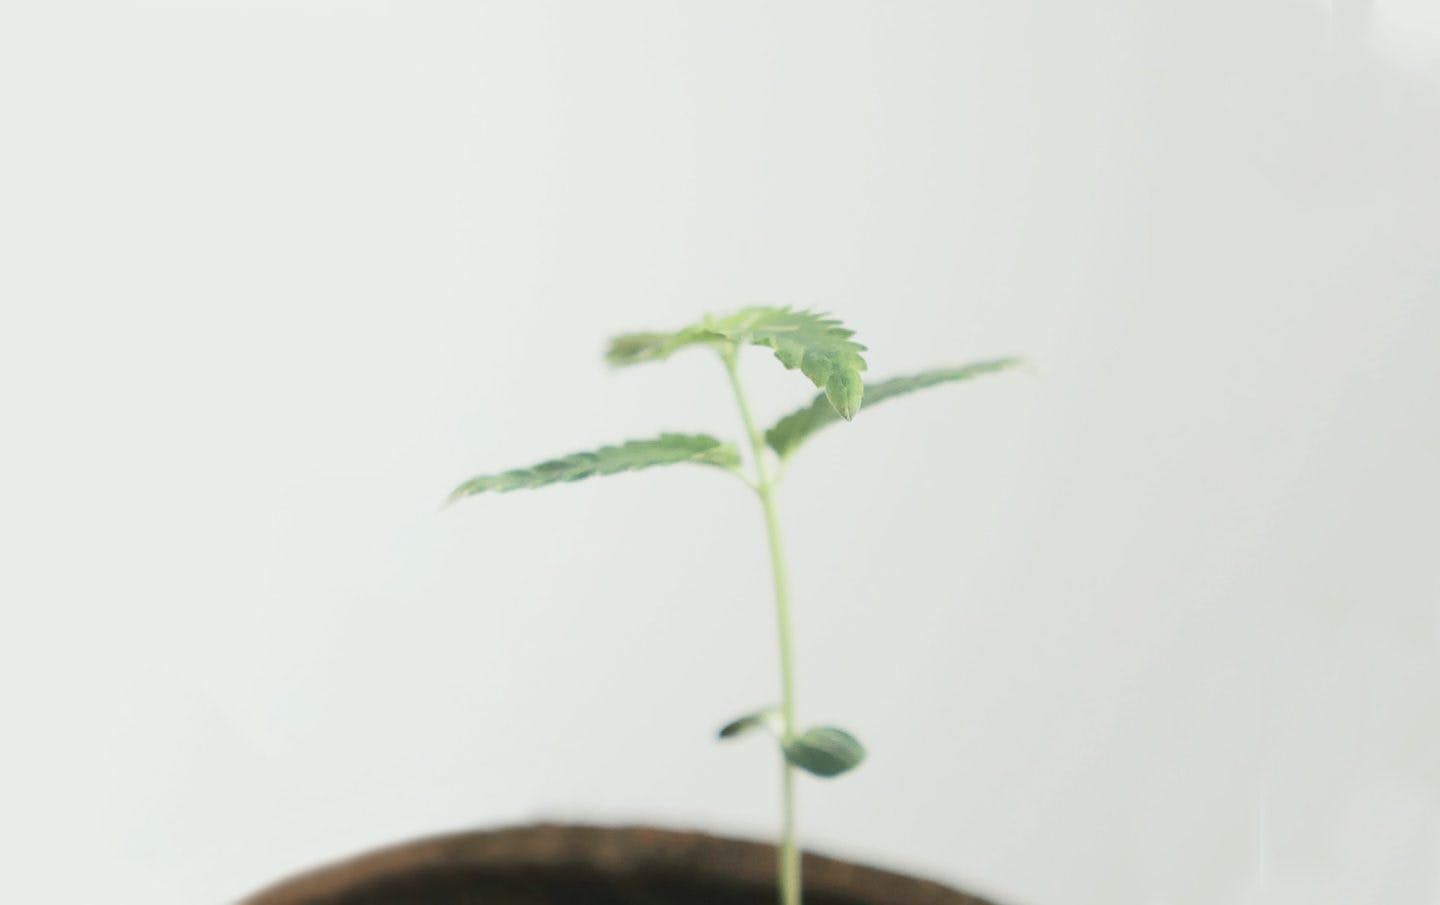
Vegetative stage – 3 – 8 weeks.
By this time, you will need to transfer your mature seedling to a larger pot. You can tell when the seedling is ready to be transferred, as the roots will outgrow the plant pot. Cannabis plants grow rapidly at this stage as they take on more nutrients and carbon dioxide.
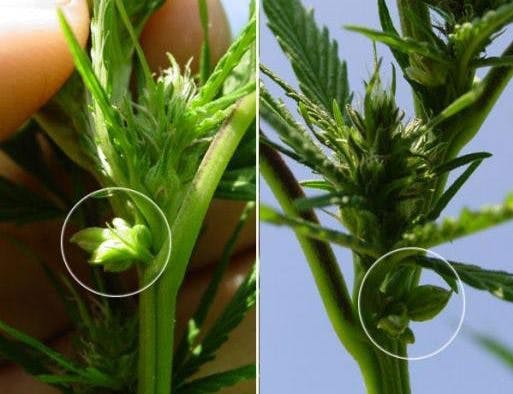
You can also do some vital checks at this point. One is checking for the sex of the plant. Females will start developing two white pistils. Males grow pollen sacs. If you see these sacs, remove the plant from the vicinity before it pollinates the females and ruins your harvest.
You can also see if the plant is going to be big and tall (often labelled a sativa) or short and bushy (often labelled an indica) at this point by looking at the leaves. Sativas have thin, narrow leaves, indicas broad leaves.
This stage is not needed if you are growing a Cannabis ruderalis variety. For feminized cannabis seeds, there isn’t a need to spot and get rid of males at this stage.
Keep the temperature between 68 and 77˚F, and the humidity between 50% and 70%. 18 hours of light and 6 hours of dark. Light wattage of around and 125 Watts. Cannabis ruderalis skips this stage entirely, and moves onto the next stage (flowering). More nitrogen (N) than phosphorus (P) and potassium (K).
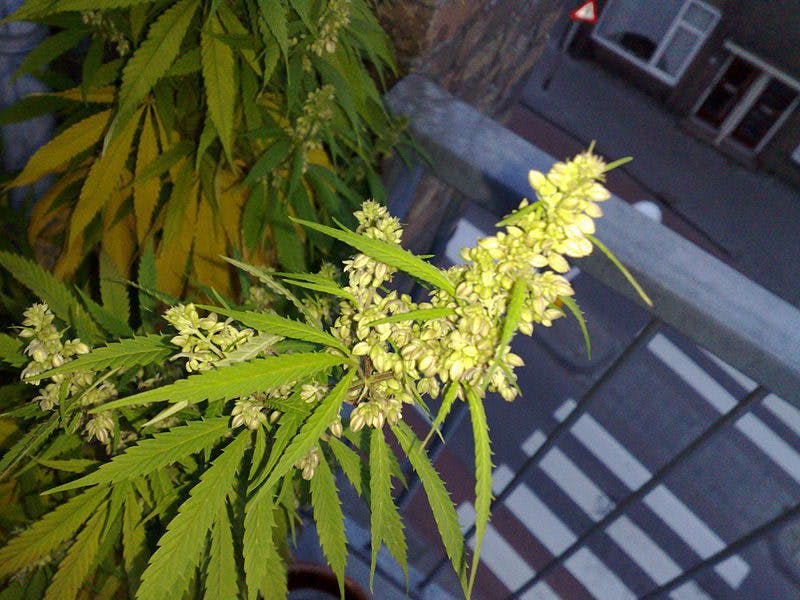
Flowering stage – 6 – 14 weeks
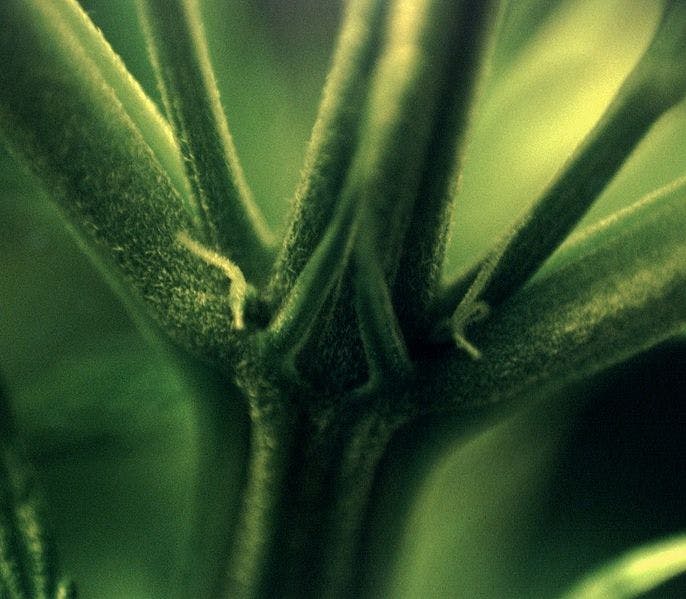
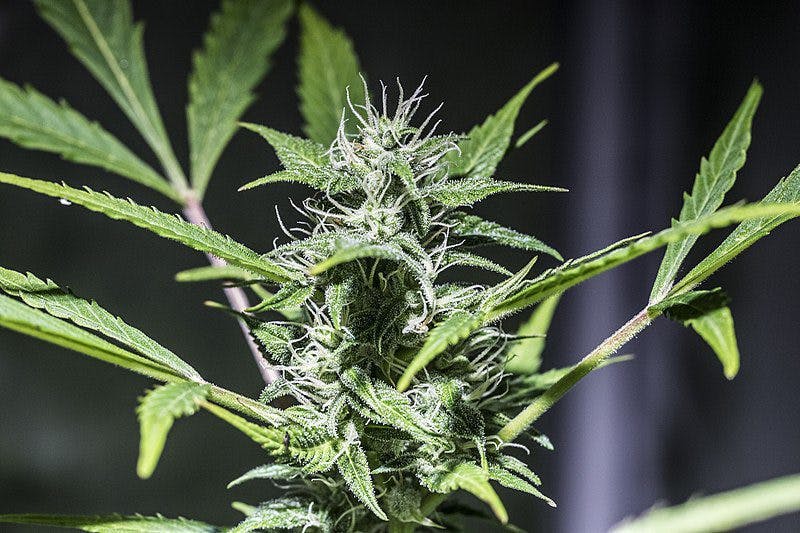
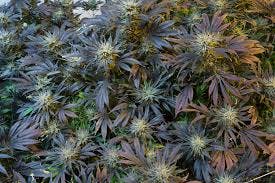
This is when the vegetative plant is fully mature and is ready to start growing buds/flowers, and you begin to see the trichomes (little white hairs that are the powerhouse of cannabinoid and terpene production).
The plant will need to be transferred to a bigger pot. The plant now needs 12 hours of light and 12 hours of dark. Indicas tend to finish flowering in about 6-9 weeks, and sativas 10-14 weeks. Most growers tend to go for a maximum of 14 weeks’ flowering.
Prevent light leaks during dark times during the flowering stage. Light leaks can cause the plant to get stressed and produce both male and female organs (called “hermaphroditism”, “hermying”, “hermied” or “hermies”), even in feminized varieties.
Keep the temperature somewhere between 68 and 77˚F, with the humidity at around 50%. Stop giving the plant nitrogen (N) now, but up the intake of phosphorus (P) and potassium (K). Once the plant is in the last week of flowering, flush the soil with distilled water and refrain from adding any more nutrients.
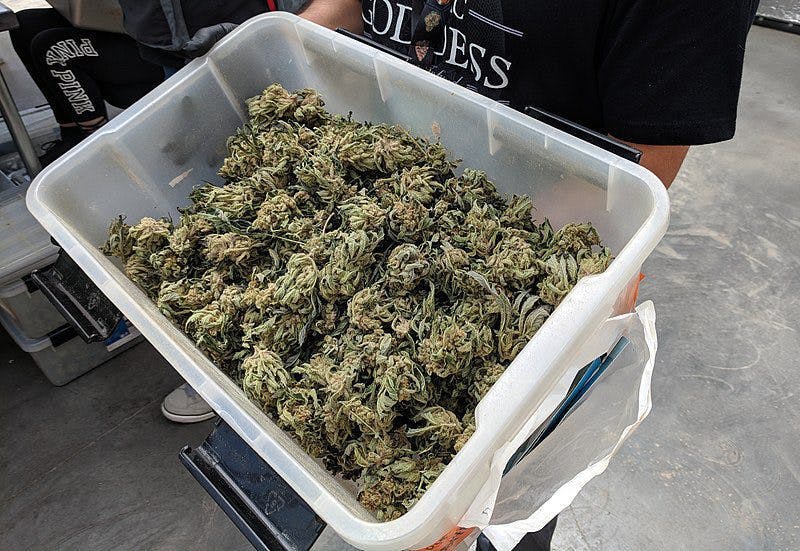
Time to harvest!
Once your plant is mature enough, it needs to be chopped and dried. But first, you need to know when to chop the plant. Some say you should harvest the plants when 70-90% of the pistils have browned.
Others look at the color of the trichomes, which start off white, then turn amber, and finally brown. Many say the ideal time to harvest is when around about half (50%) of trichomes are amber. Too clear, and it can be too soon (but can produce a more energetic effect). Too brown, and the cannabinoids lose their potency (although some may prefer slightly less psychoactivity).
Pruning
You will need to remove the leaves from the bud. Some of the leaves will contain lots of trichomes. These can be saved to make extracts, tinctures and edibles. It is best to do prune after your plants have been chopped, but not before drying, as pruning after drying is more difficult.
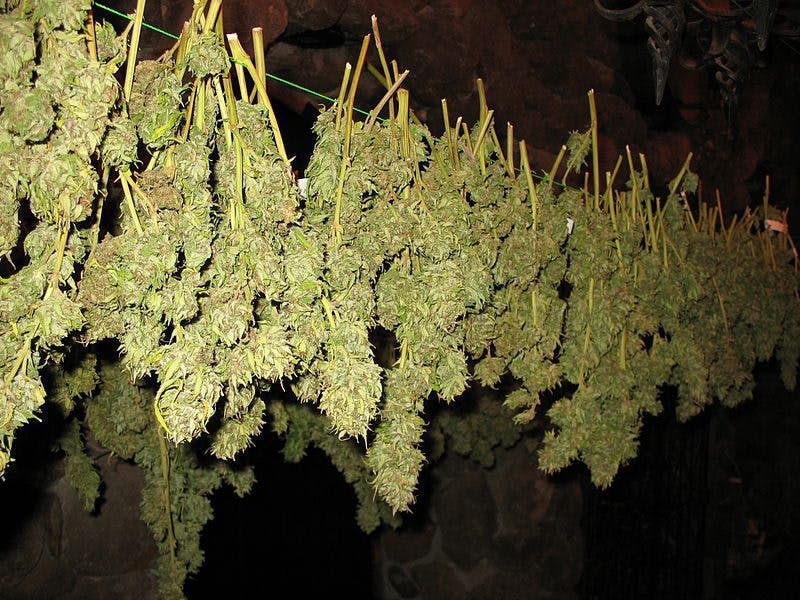
Drying – 1 – 2 Weeks
You need to dry your cannabis plants in a dry room away from sunlight for about 7 – 14 days. Your cannabis plant will be ready for chopping into smaller buds for jarring once the plant stem snaps when you bend them. This is an extremely important stage, as good drying will prevent your cannabis from developing mold or mildew.
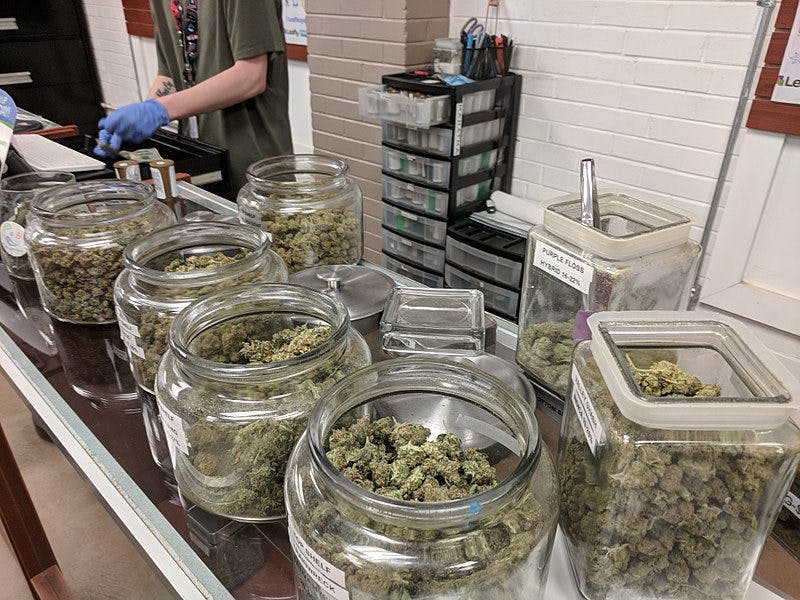
Curing
After you’ve chopped, pruned and dried your cannabis, it is usable, but it is not at its best. You will want to put your cannabis into a mason jar (no more than 3-quarters full) with an airtight seal. You will then leave it in there for 2 weeks – 1 month, opening the jar once a day to let the cannabis breathe. This will break down the sugars and chlorophyll in the bud/flower, and you will get a far more flavorsome product with a well-defined effect.
Pruning, drying and curing is as important as the growing and harvesting part, and should not be rushed. Many people who have grown excellent plants can lose some or even all of their hard work at this stage, and you do not want your buds to go moldy because you rushed at the final hurdles. There is a vast chasm of difference between well-cured cannabis and cannabis that hasn’t been dried properly.
What Are Marijuana Plant Cuttings?
For those who are new to horticulture, cuttings are a means of vegetative propagation. Taking a cutting means cutting off a piece of the stem or root of the source plant (called the mother plant), which is then placed in a suitable medium (e.g. moist soil). Cuttings are taken off a mother marijuana plant that is kept in permanent vegetative stage, and planted into soil ready to go into flowering. Many use this method to keep a hold of a phenotype of cannabis they particularly enjoy, and can make future grows faster, as the grower does not have to go through the vegetative stage every time they grow. Many dispensaries sell cuttings in states where patients can legally grow.
Download Free Beginner’s Guide to Growing Cannabis
What Nutrients Are Required for Growing Cannabis?
Just like humans, plants need nutrients to grow healthy. In the case of fruit and vegetables, the three main macronutrients which a cannabis plant requires are nitrogen (N), phosphorus (P) and potassium (K). The three main micronutrients cannabis requires include calcium (Ca), magnesium (Mg) and sulfur (S). Macronutrients are needed in greater amounts than micronutrients. Nevertheless, micronutrient deficiency can be a problem if not treated.
Nitrogen
Nitrogen is a major component of chlorophyll, which the plant needs to convert sunlight into food for the plant. Nitrogen is also found in the soil, which is fixed by bacteria for the plant, allowing the plant to build amino acids and proteins.
Nitrogen deficiency is characterized by the lower leaves turning yellow and falling off.
Phosphorus
Plants use phosphorus for photosynthesis, storage and transfer of energy, respiration, and many more things besides. Phosphorus is also the link between base pairs in DNA. Phosphorus is essential for the development of amino acids (the building blocks of proteins) and adenosine triphosphate (ATP), which is like the powerhouse of cells in both plants and mammals.
Phosphorus deficiency is characterized by weak, spindly stems, stunted plant growth, and bluish-green leaves.
Potassium
Potassium regulates the opening and closing of stomata, and therefore regulates CO2 uptake. This makes potassium essential for evapotranspiration, and helps the plant “breathe”. Potassium triggers activation of enzymes and is essential for production of adenosine triphosphate (ATP).
Potassium deficiency is characterized by reduced root, seed and fruit/flower development, and brown scorching and curling of leaf tips as well as chlorosis (yellowing) between leaf veins. The leaves may also display purple spots on their undersides.
Calcium
Calcium plays a very important role in developing and maintaining plant cell walls, helping the plant grow. Calcium helps to maintain chemical balance in the soil, reduces soil salinity, and improves water penetration. Calcium neutralizes cell acids.
Calcium deficiency initially appears as localized tissue necrosis leading to stunted plant growth, necrotic leaf margins on young leaves or curling of the leaves, and eventual death of terminal buds and root tips. You can tell calcium deficiency by paying attention to new growth spots in particular, as this is where a lack of calcium shows up first.
Magnesium
Magnesium plays an essential role in photosynthesis, contributing to the plant’s green color and helping it fix energy from the sun’s rays. Magnesium is also used by plants (not just cannabis) for the metabolism of carbohydrates and cell membrane stabilization.
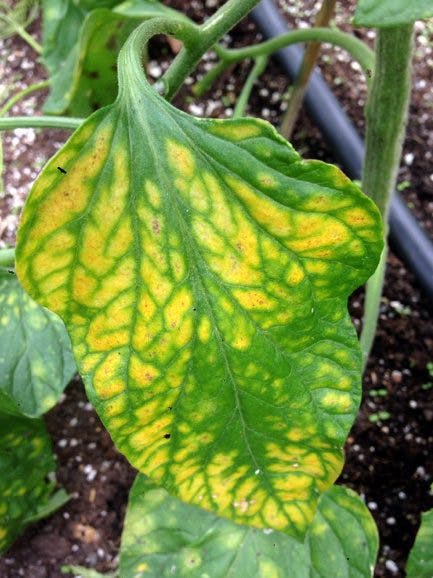
Magnesium deficiency is characterized by interveinal chlorosis, or yellowing between leaf veins, which stay green, giving the leaves a marbled appearance.
Sulfur
Sulfur helps form important enzymes and assists in the formation of plant proteins. Sulfur is essential for nitrogen-fixing nodules on plant roots, and is also necessary in the formation of chlorophyll.
Sulfur deficiency in plants is characterized by yellowing or pale green coloring throughout the plant. Younger leaves suffer from yellowing, with their tips becoming necrotic.
When it comes to feeding your cannabis plant, the general rule of thumb is that, if you are using soil, less is more. This is because soil usually contains enough nutrients.
However, sometimes a little help is required. Here’s a guide as to what nutrients the cannabis plant requires, in what ratios, and when:
Vegetative stage feeding recommendations:
Early veg stage (N:P:K ratio): 2:1:2 – 4:2:3
Mid-veg stage (N:P:K ratio): 10:5:7
Late veg stage (N:P:K ratio): 7:7:7
Flowering feeding recommendations:
Early bloom (N:P:K ratio): 5:7:10
Mid-bloom (N:P:K ratio): 6:10:15
Mid–late bloom (N:P:K ratio): 4:7:10
Late bloom (N:P:K ratio): just use water in the last week of the flowering stage, to flush out
Get Your Medical Card
Connect with a licensed physician online in minutes.
Growing Cannabis Indoors vs. Outdoor vs. Greenhouse – Which is Best for Me?
Each has its advantages and disadvantages. Most people start off growing indoors, as they start to learn more about the plant and its growth patterns indoors. Indoor grows usually have fewer variables to be concerned about. Outdoor growing is satisfying and can produce excellent results, but can require a bit more understanding of the cannabis plant’s biology. You also need to be able to choose the right spot for an outdoor grow, which can take some time and effort.
Which Strain of Cannabis Should a Beginner Grow?
We recommend that beginners choose something that is hybridized and is vigorous, that is forgiving of mistakes and has been a long-term success for many growers. Feminized seeds or ruderalis varieties are usually bgeinner-friendly. However, ruderalis plants may contain less THC compared to Cannabis sativa or indica.
Download Free Beginner’s Guide to Growing Cannabis
Some suggestions for for a beginner’s strain include:
Northern Lights (NL) – An Afghan variety that grows short and squat, and finishes in about 8 weeks of flowering. A variety of cannabis that revolutionized the homegrown cannabis scene, and still going strong.
Skunk #1 – A cross between Afghan, Acapulco Gold and Colombian Gold, Skunk #1 has been used in many crosses since as it is both stable and has pedigree genetics stretching back generations.
This means Skunk No. 1 individuals with unique characteristics (phenotypes) still show up in cannabis grows today. Skunk No. 1 is a parent of the famous UK Cheese. Developed and maintained by legendary breeders like Sam the Skunkman and Mr. Nice’s Nevil and Shantibaba.
Blue Dream – A cross between Mr. Nice’s Super Silver Haze (SSH) and DJ Short’s Blueberry, Blue Dream is an offspring of the genetics from two elite breeders. Blue Dream is widely available and loved by beginners and connoisseurs alike for its flavor and effect. Cuttings are often available to buy in dispensaries throughout the West Coast of the US.
Cheese/Blue Cheese – Cheese comes from Skunk No. 1, and Blue Cheese is a cross between DJ Short’s excellent Blueberry and UK Cheese. As it is made to grow in the UK climate, Cheese and Blue Cheese are good choices for those who are not always in warm climates.
As their names would suggest, both Cheese varieties have quite the odor to them, so are not the most discreet of plants. Those who are looking for a phenotype of Skunk No. 1 that isn’t as funky-smelling or potent as Cheese may want to go for something like Orange Bud or the related California Orange.
Blueberry – A classic cross of Thai and Central American genetics by DJ Short, Blueberry is a legendary variety of cannabis that has made its way into many of today’s crosses.
OG Kush – As popular as Blue Dream, and like the other strains on this list has been used to create numerous other popular strains, such as Girl Scout Cookies (OG Kush x Durban Poison) and Headband. OG Kush is a cross between California’s Chemdawg and India’s Hindu Kush, invented in Florida.
OG Kush is widely available, relatively easy to grow, good yields – there’s a lot going for this plant. For those looking for Kush genetics of similar pedigree and unique terpene profile, Pre-98 Bubba Kush may be an alternative choice.
Any autoflowering or ruderalis variety of cannabis – Breeders have been working with the ruderalis plant for quite some time now, and have crossed it with a number of genetics in their own seedbank.
Autoflowering varieties negate the need for a vegetative period, and automatically go into flowering regardless of the light cycle (the wattage is still needed for bud production). Although not necessarily as potent as Cannabis sativa or indica, ruderalis varieties may contain plenty of CBD.
Get Your Medical Card
Connect with a licensed physician online in minutes.
Growing Cannabis Indoors – Soil, Hydroponics, Aeroponics
With indoor grows, you get a high degree of control over the environment, it’s easier to keep out of sight of the outside world, and you can get a regular yield.
However, indoor grows can take a lot of work when it comes to growing more than a few plants, and unless you are in a large house the smell and heat from bright lights can be an issue.
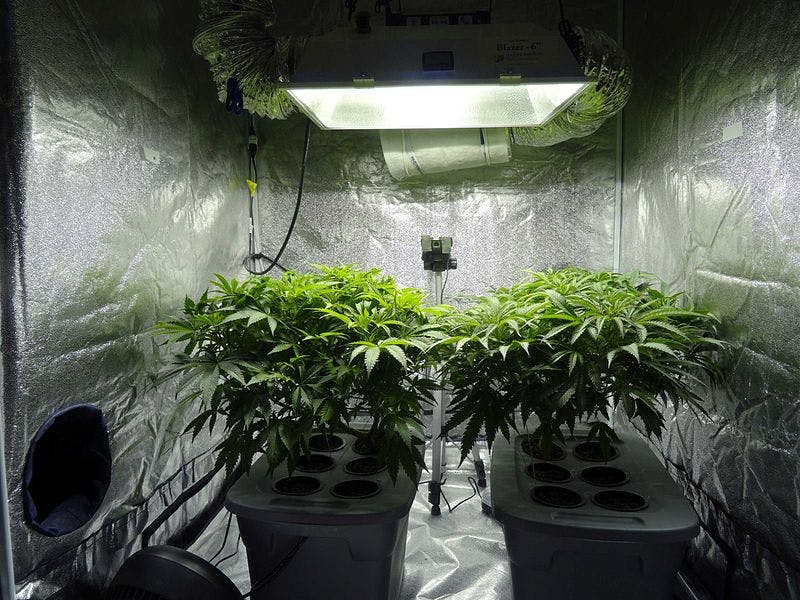
Growing cannabis indoors requires you to build a grow room. This is a tent where you can house your plants. Most start with a grow space of around 3 x 3 feet or 4 x 4 feet, and about 4 to 12 plants.
You will need a light for vegetation (about 125 watts), a light for flowering (400 watts – 600 watts for most grow rooms is sufficient), pots of various sizes for the germination, seedling, vegetative and flowering stage, a thermometer (you will want to keep the temperature at around 26℃ – 28℃, or between approximately 78℉ – 83℉), a fan to produce passive air flow, a humidity checker (hygrometer), a pH meter, carbon filters to draw out smell, and a stage to put your plant pots on. You will need to keep your grow room clean.
The inside of the grow rooms will contain refractive material to prevent light loss, and be completely dark when the lights are off to prevent light from getting in. Cannabis that does not receive appropriate dark time will get stressed and become prone to hermaphroditism (i.e. it will show both male and female parts) and self-pollinate, producing less bud/flower and more seeds.
Essentially, with growing cannabis indoors, you are recreating the ideal outdoor conditions the plant would thrive under. There are a few major ways to grow cannabis indoors.
Indoor Cannabis Soil Grows
This is perhaps the easiest and most beginner-friendly way to start growing cannabis. Get some good quality soil, plant pots, lights and a grow tent, and you’re pretty much ready to get started. With soil, you do not need to feed the plant too many nutrients, as the soil contains most of them.
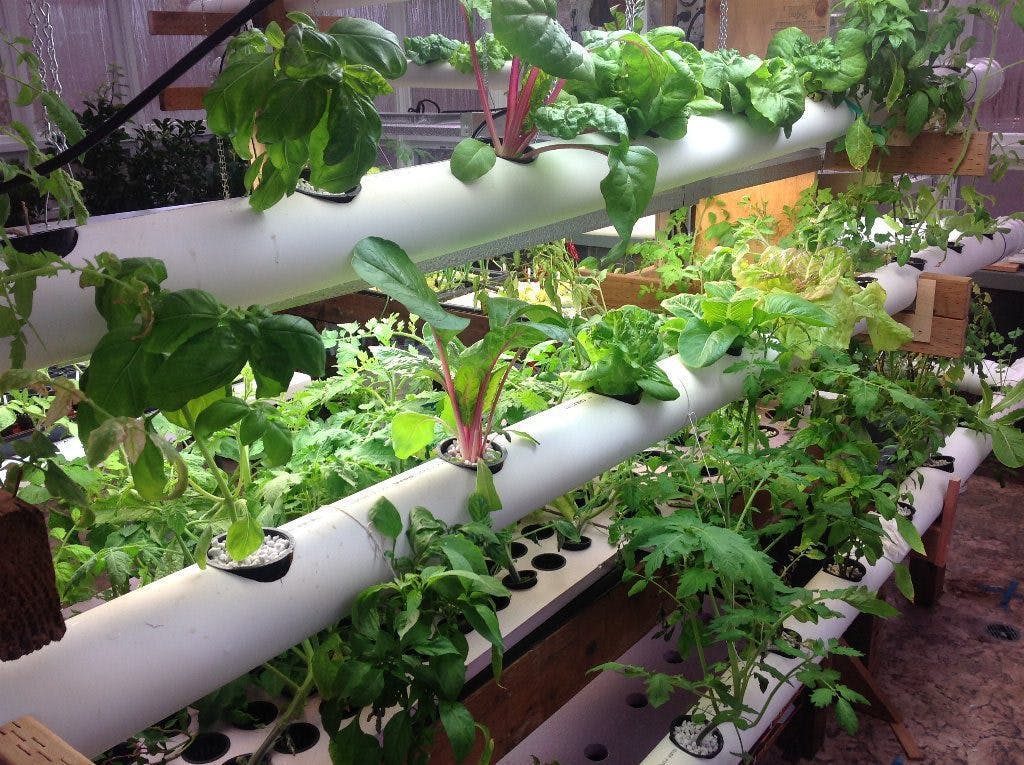
Hydroponic Cannabis Grows
Hydroponics is where you grow cannabis using mineral nutrient solutions in a water solvent. Basically, the plant will usually be in a pot surrounded by inert growing medium (e.g. perlite, vermiculite, clay aggregate, gravel or sand) and have a nutrient solution pumped through the inert material and into the plant (continuous flow solution culture). In some methods, the plant is kept in a reservoir of nutrients (static solution culture).
Hydroponically-grown cannabis can produce large, powerful yields, but requires a lot more precision in terms of knowing what nutrients your plant needs and when. You will also need to know more about the differences between strains and how they grow. The water needs to be aerated as well. Hydroponic grows are best left to those with more experience.
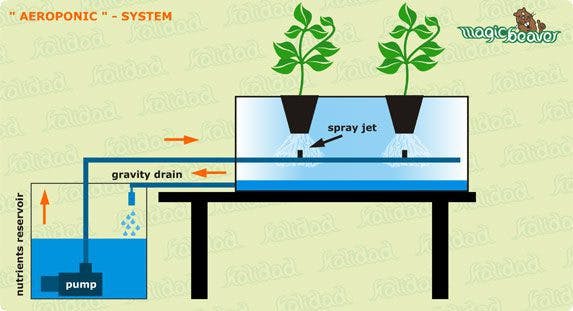
Aeroponic Cannabis Grows
Aeroponics is similar to hydroponics in many ways, except the plant’s roots are kept in an aerated chamber saturated with fine drops of nutrient solution. The roots periodically wetted with a fine mist of atomized nutrients.
Aeroponic grows require fewer nutrients and less water compared to hydroponic grows, and unlike hydroponically-grown plants can be transferred to soil mediums without shocking the plant.
Many of the disadvantages of aeroponics are shared with hydroponics. Aeroponic cannabis grows require constant supervision, and the initial cost of setting up can be high. In fact, aeroponics can have far higher startup costs than hydroponics. The system can break down easily, and the chambers need to be disinfected regularly.
Aeroponics can produce extremely high yields very efficiently, but requires much more technical know-how compared to soil grows. For many, the time and stress associated with hydroponics and aeroponics is not worth the extra yields. For people doing small, personal grows, soil usually does the trick, and the yields can be comparable if done right.
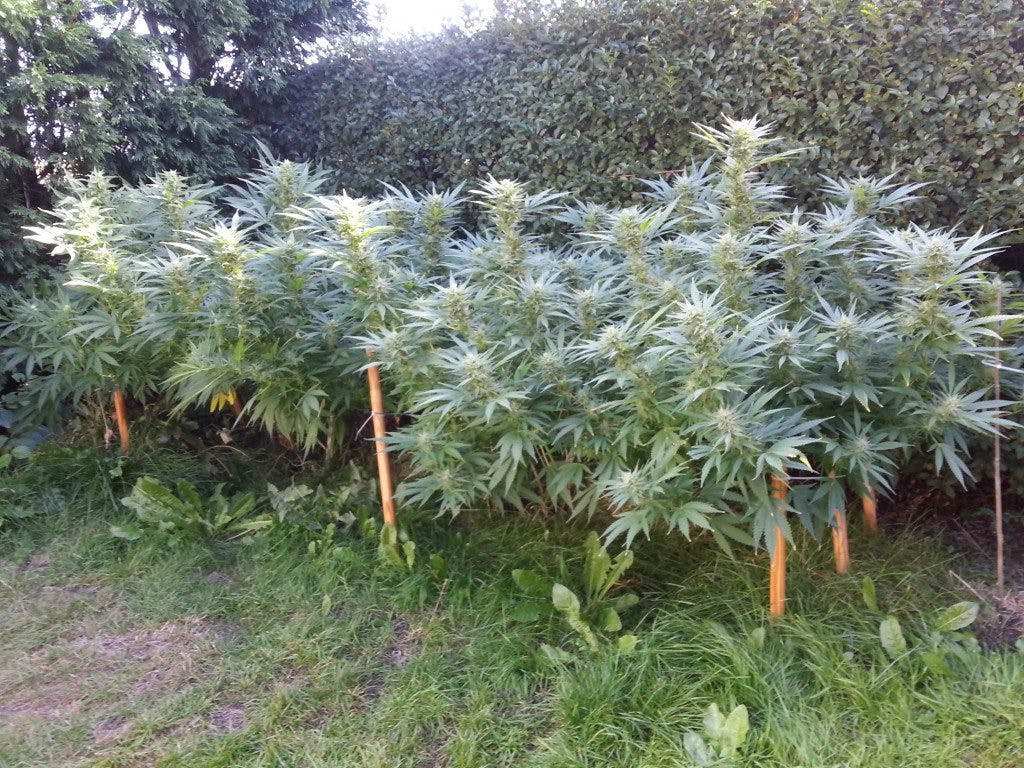
Growing Cannabis Outdoors
With outdoor grows, you can use natural soil and sunlight to do most of the work, and many people prefer the results of outdoor cannabis with regards to its smell, taste and effect. However, growing outdoors can be legally risky, and there are a lot more variables to consider.
You now have nature to contend with, so the weather, pests and mammals are of greater concern. Unless you are blessed with year-round cannabis growing weather, you can only grow once or twice a year outdoors.
Growing outdoors is both simple and complex. Yes, you are letting Mother Nature do most of the work, and it can be a case of simply germinating a seed at the right time of year, putting it in a pot, leaving it outside in the sun, and transferring to healthy soil in the ground once the cannabis plant has good roots.
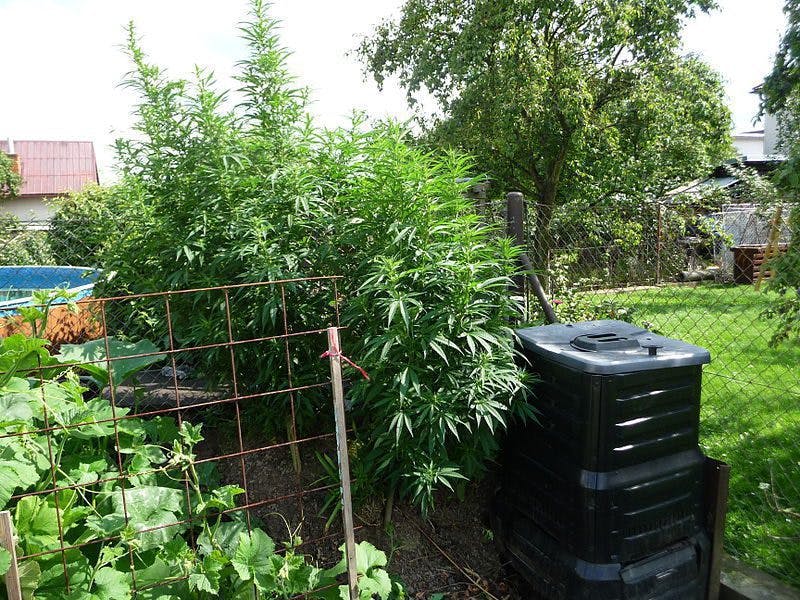
On the other hand, you have to be able to take the rough with the smooth outdoors. Guerilla growers have to be wary of law enforcement, thieves, and a greater number of pests, whilst backyard growers will have to be careful of concerned neighbors and that the plant is getting appropriate water and sunlight.
You are at the mercy of the elements outdoors. If everything goes well and is done right, you will get huge yields from plants allowed to grow outdoors to their maximum potential. If something goes wrong, you can lose entire crops, or get much lower yields than expected.
Growing cannabis outdoors is generally best done in equatorial or Mediterranean climates, where cannabis can grow naturally quite easily without our assistance. Still, some people can get excellent results growing outdoors in places like Australia, southern UK, France and many other countries that have temperate climates or unique microclimates.
The best time to grow in the Northern Hemisphere at a latitude of 25º and 50º, the best time to start growing outdoors is by the end of April or May, and harvesting between September, October and November. For the Southern Hemisphere at a latitude of 25º and 50º, planting time begins in September and harvest time is between March, April and May.
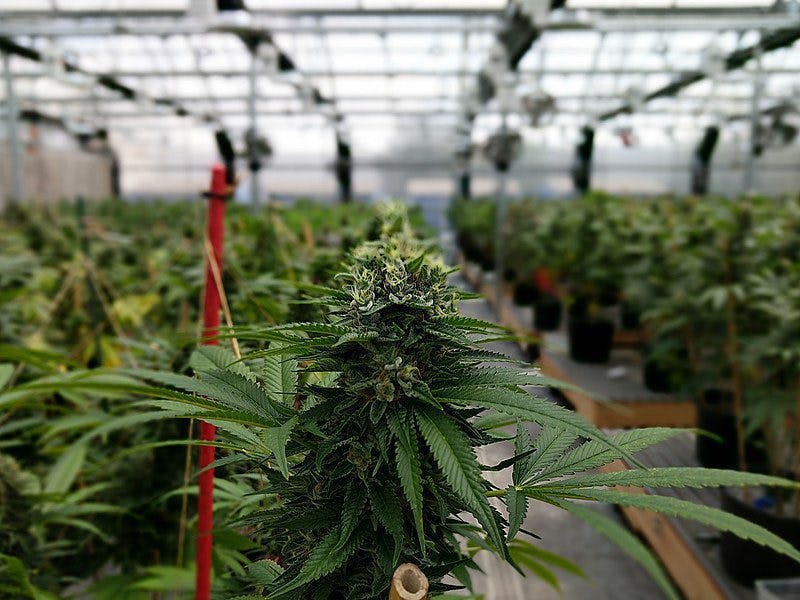
Greenhouse Growing
The greenhouse can meld together the advantages of both indoor and outdoor cannabis growing. Greenhouses can be covered to produce true dark time, and the cannabis is kept in a protective environment which can reduce the chances of pests (though not as much as an indoor grow).
On top of this, greenhouses allow in natural light, allowing for the full development of the cannabis plant’s cannabinoids and terpenes. Greenhouse growing also uses far fewer resources compared to indoor grows, so less energy is spent on lights and fans. The enclosed environment can also make it easier to hide from prying eyes, and you can use other plants to camouflage the cannabis.
However, greenhouse grows are still prone to the seasons, and a good amount of natural light is still required. Temperatures and humidity levels are also harder to control. Still, those who want to step into the world of outdoor growing, and who are in a suitable environment, ought to consider a greenhouse.
Sea of Green (SoG) or Screen of Green (ScrOG)?
SoG and ScrOG are growing techniques used to train the plant in order to increase yield. The ScrOG technique focuses on producing multiple bud sites using a wire grid, the SOG technique does the opposite, forcing the cannabis plant to put all its energy into one main kola.
The SoG method requires having a “mother” plant kept in permanent vegetative stages. From this plant, you take cuttings, which you can put into flowering straight away. You take several cuttings from the mother plant, pot them, and put them under a 12/12 light-dark cycle straight away.
You can grow many smaller cannabis plants using SoG, and is particularly suitable for those with limited space. ScrOG works better if you are just wanting to maximize the yield of a few plants. Both SoG and ScrOG methods are suitable for a 3 x 3 or 4 x 4 grow space.
There are countless guides to growing your own cannabis out there. Some are good, others are a bit more difficult. Out of all the guides out there, the best by far for beginners is probably Jorge Cervantes’ educational videos. On growing cannabis. Jorge does an excellent job, and is both thorough and approachable.
Advice for Those New to Cultivating Cannabis? Keep it Simple!
We recommend indoor grows to start off with, although greenhouses can be a good option as well, especially if you have experience with growing other plants in a greenhouse environment. Some people graduate from indoor grows to outdoor grows, as they learn more about the plant and want to reduce their impact on the environment. The sun also imparts a unique effect on cannabis and the terpenes that form in the plant.
Soil is a better choice for beginners compared to aquaponics or hydroponics, as less can go wrong with regards to nutrients. Soil, light, water is a lot easier to remember than precise nutrient doses and ensuring all the equipment is working properly.
Pick a hybridized cannabis variety or strain to grow. Skunk #1, Northern Lights, Blue Dream, Gorilla Glue #4, and Blue Cheese are some easy-to-grow varieties, and you can get a wide range of effects from all of them. Feminized and autoflowering seeds can make this even easier, as you do not have to sex or vegetate the plant first.
Start off small. 4 to 6 plants in a 3 x 3 space is usually sufficient to start with.
Healthy roots = healthy plants. Like a well-built house, it all starts from the foundation.
Get Your Medical Card
Connect with a licensed physician online in minutes.